3. Instructor & Student Accounts & Onboarding
Section 3.3 includes a Slide deck and Syllabus for instructors to use to onboard students.
3.1 Your Instructor Account
Once you create your Instructor Account (see Section 1), log in to review the Instructor Dashboard (website).
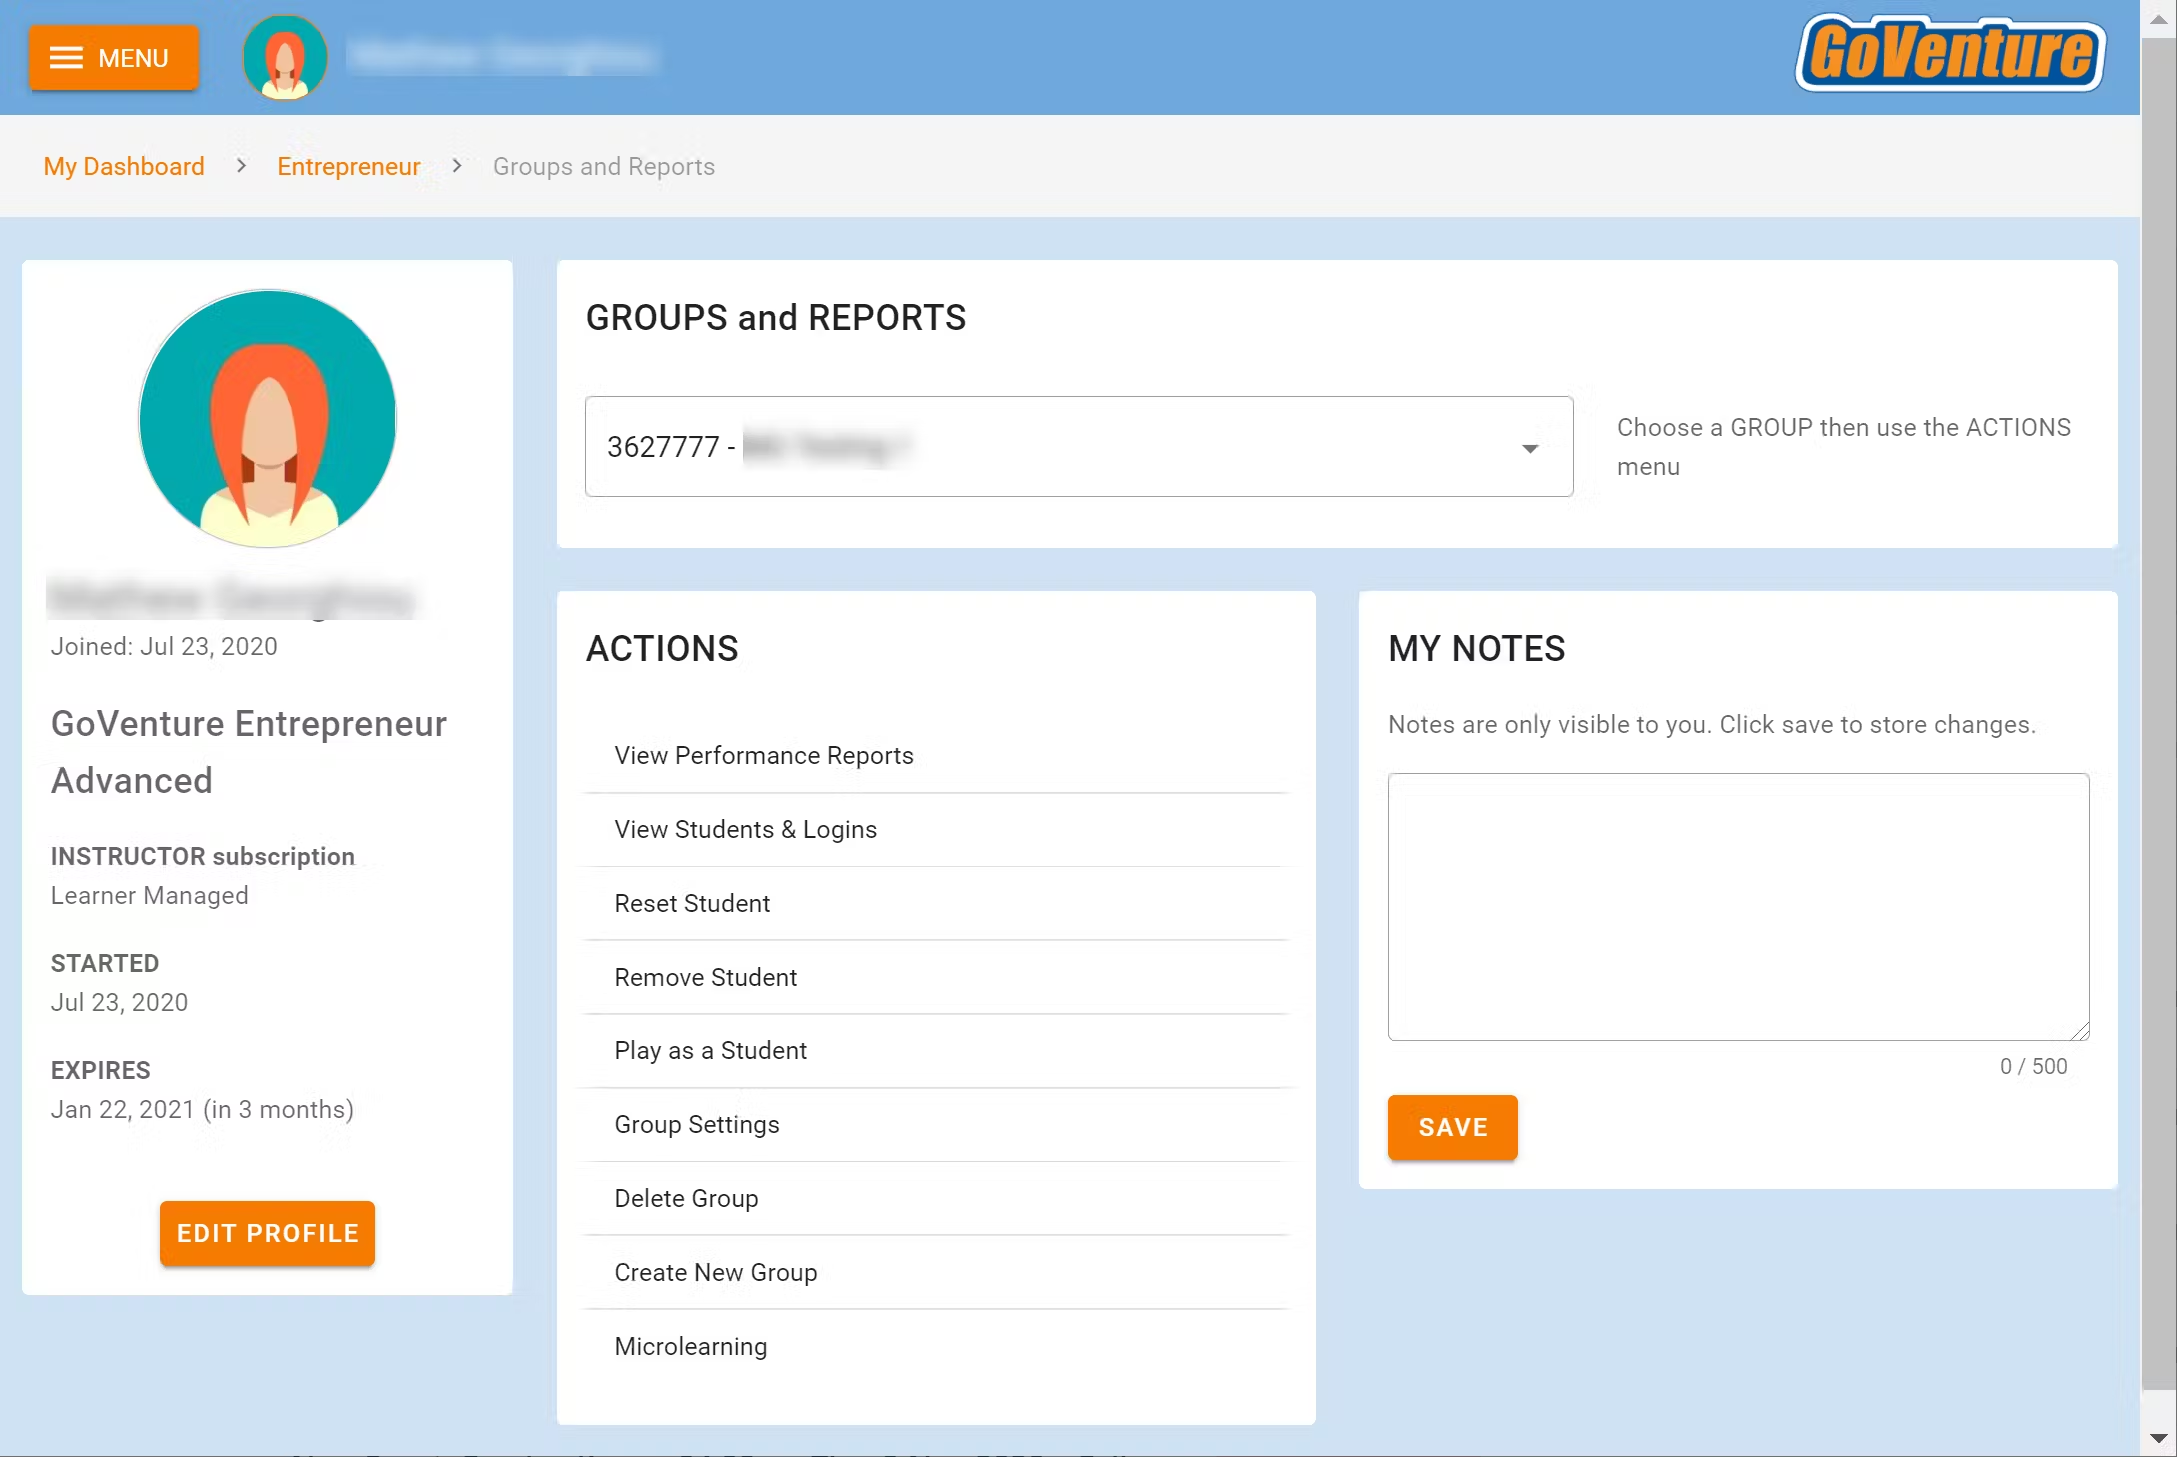
The Instructor Dashboard allows you to create Groups, monitor student progress and performance, and play GoVenture as a student.
Screenshot of the Instructor Dashboard (website) with options for managing a Group
3.2 Sharing Instructor Accounts
Instructors can share access to their accounts with other instructors or colleagues.
3.3 Student Accounts
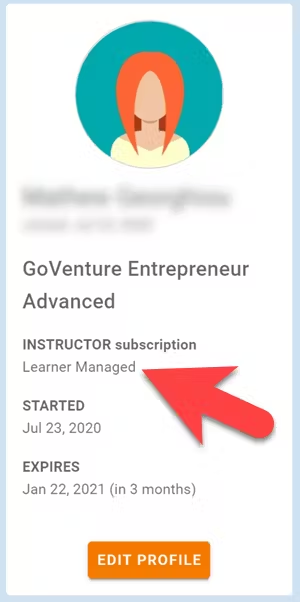
Identify the type of account that applies to you and review the details below. Your type is displayed on your instructor dashboard as shown below.
- Learner Managed — College, Nonprofit, Business
- Instructor Managed — Primarily for K-12 Schools
- Perpetual or SUITE
3.3.1 Learner Managed account — primarily for colleges, universities, nonprofits, and businesses
- Students create and manage their own personal login accounts.
Students create accounts with a Subscription Key — a 32 digit number that looks like this: 12345678-12345678-12345678-12345678.
Students can purchase their own Subscription Keys or organizations can purchase them for students using any combination of these three options:
- Purchase keys individually or in bulk using a credit card or PayPal at BuyGoVenture.com
- To buy with a Purchase Order, use our Order Forms at GoVenture.net/prices
- To sell through a bookstore, review the information at GoVenture.net/bookstore
Give students the Group number you want them to play and your student roster will build automatically as students join your Group. You do not have to input student names, emails, or any other information — it's all automated.
Use this Slide Deck or the Sample Syllabus (section 11) to introduce students to GoVenture — copy this content into your own course content and customize it to fit your approach (do not give students links to this document).
3.3.2 Instructor Managed account — primarily for K-12 schools
Watch the video above or follow the directions below to see how student accounts work.
Use this Slide Deck to introduce students to GoVenture.
Instructor Managed subscriptions do not require students to create full accounts on GoVenture. Students do not have to disclose personally-identifiable information.
Instructors do not need to input a student roster. This will be done automatically by GoVenture.
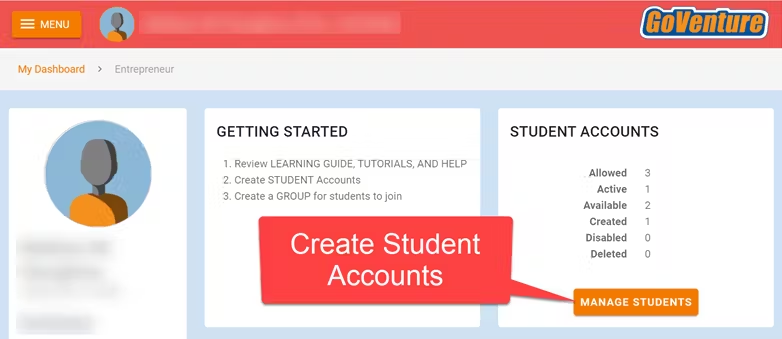
Instructors use the GoVenture dashboard to create student accounts as they need them.
When an instructor creates a student account, a unique USERNAME is generated for the student. The USERNAME is a multi-digit number that is automatically generated — the instructor cannot choose the number (but can edit it after it is created). Instructors do not have to set the student PASSWORD (but can change it if needed).
The instructor provides the USERNAME to the student and directs the student to log in to the GoVenture website at PlayGoVenture.com. Students should not use the Create Account option.

Use this spreadsheet to share usernames with students — click the link to view the document then choose FILE > DOWNLOAD for your own copy to edit.
GoVenture will determine if this is a new USERNAME being used for the first time and prompt the student to set a PASSWORD and their name or student ID or pseudonym (if maximum privacy is preferred).
No personally-identifiable information is required of students. But, it is important that students use a unique identifier that allows the instructor to know who they are for monitoring and grading purposes.
Alternatively, the instructor can manually record student names with their assigned USERNAMES. NOTE: If you direct students to enter their full names, you may want to consider directing them to enter their last names first (such as "Smith John" or "Smith, John") so that your Performance Reports can be sorted by last name.From now on, the student uses their personal USERNAME and PASSWORD to log in to GoVenture.
Once a student logs in to GoVenture, they have access to the User Guide, resources, and other help information. But, students need to join a GROUP Number to play the Simulation. Instructors must provide students a GROUP Number to join.

Disable, Delete, Edit Student Accounts
Instructors can reset student PASSWORDS if needed.
Your school or District is assigned a maximum number of instructor accounts and student accounts that can be active at any one time (concurrently).
Instructors can DISABLE individual student accounts when they are no longer needed (such as at the end of the semester or year, or if a student drops out). Disabling a student account reduces the number of active student accounts, thereby providing room for another student account to be activated. Disabled accounts do not count towards the maximum number of concurrent accounts allowed. Disabling a student account retains all student progress and results, allowing the account to be activated again at any time.
Instructors can DELETE individual student accounts. Doing so permanently erases all student progress and results and the same student account cannot be activated again.
Instructors can EDIT student accounts.
A student account that is created by an instructor but never actually used by a student will not count towards the maximum number of student accounts allowed. (Used means a student has set a password.)
3.3.3 Perpetual or SUITE Licenses
With this type of license, GoVenture is installed on school computers. Internet is not used.
There are no instructor accounts and no student accounts— no logins.
The GoVenture software runs from the computer on which it is installed, not online.
Student progress is saved on the computer hard drive, shared network drive, or USB drive. Students must maintain access to the save file location in order to resume progress.
Students should choose SAVE LOCATIONS that are unique or private to them, so that only they can access their own save files.
Three Save Slots
Each student can have up to 3 simulations running at the same time. There are 3 save slots that can be used to save those simulations.
Each save slot can store any of the 3 business types — Lemonade Stand, Kiosk, or Full Business. This means a student can save 3 Lemonade Stand simulations at the same time or 2 Lemonade Stands and 1 Kiosk, etc.
To access the save slot for a specific business type, choose that specific business type on the business type selection screen. You will then see options to resume a saved simulation for that specific business type. You can also delete other saved business types if you want to free up a save slot to use with the currently selected business type.
How Saving Works
When a student launches GoVenture, they will be presented with this message:
Your progress will be stored in a save file in the folder that you choose on the local computer, network drive, or external drive.
When you quit and restart this program, this same folder will be used to find the save file and resume your progress. Do not delete the save file or your progress will be lost. If you move the save file or folder, you will be prompted to choose the new location.
This save location will be stored in your Windows or macOS login profile. If this computer is shared by other people, you should choose a folder that is private to you. You should also log out of Windows or macOS when finished using the computer so that someone else does not use your save file.
If you play more than one GoVenture program, you will be prompted to choose a save location for each program. You may choose the same save location (separate save files will be created for each).
Technical Details — How to force GoVenture to prompt for a new save location
You do not need to follow these directions unless a student save file has been moved by mistake.
Quit GoVenture.
When a student selects a save location, GoVenture stores the path to this location in the appdata folder.
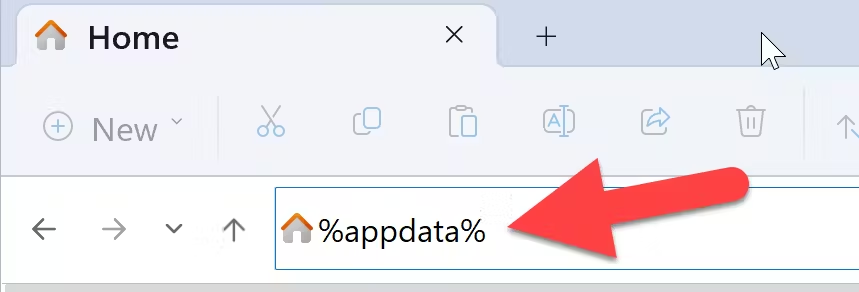
To find the appdata folder for the user that is currently logged in to Windows, open Windows File Explorer and type %appdata% in the address bar then press [enter].
Find the folder with the same name as the GoVenture program you are using and double click it to open the folder.
Find and delete file Settings_x.x.x — the x.x.x will be the latest version number.
With the Settings file deleted, running GoVenture will prompt you to enter a new save location. If the save location you choose has a previously-saved Simulation file, then GoVenture will resume that file.